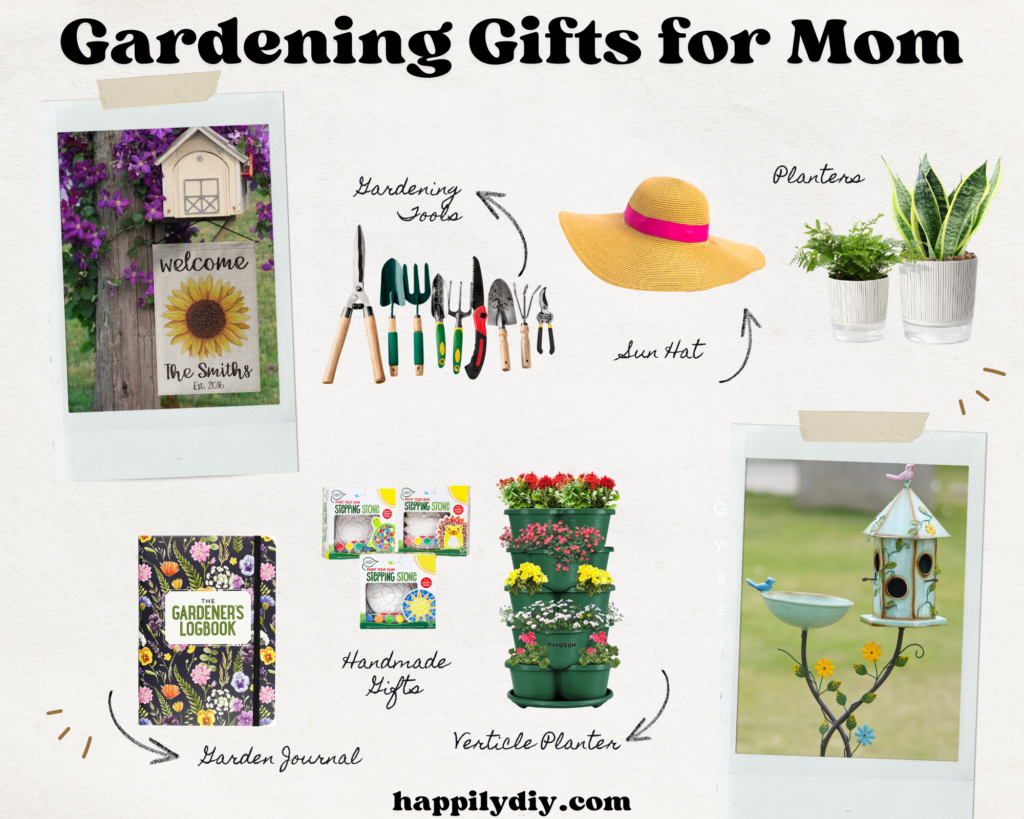
These Gardening Tips & Ideas are the secret to keeping your houseplants happy and your outdoor garden thriving — without feeling overwhelmed.
This post is packed with smart tips, easy tricks, and creative inspiration to help you grow beautiful greenery, whether it’s on your windowsill or in your backyard.
From leafy indoor plants to blooming flower beds and container gardens, this DIY guide has something for everyone.
Maybe you’re a total newbie just trying to keep a succulent alive, or maybe you’re ready to level up your patio plants—we’ve got you covered.
These tips will help you build confidence, troubleshoot common problems, and enjoy the peace that comes with growing something green.
What is the 3-hour rule for gardening?
The 3-hour rule is a time management tip for gardeners: limit big gardening sessions to about three hours at a time. Why? After that, you’re more likely to get tired, make mistakes, or burn out. It encourages pacing yourself so you can actually enjoy the process—gardening shouldn’t feel like a chore!
What is the most common mistake of first-time gardeners?
Overwatering. Hands down. A lot of new gardeners show love by giving plants too much water, which can lead to root rot. The key? Check if the soil feels dry an inch down before watering, and get to know what each plant really needs—your cactus doesn’t want the same drink schedule as your basil!
What is the gardening 3-year rule?
The gardening 3-year rule says: the first year your garden sleeps, the second year it creeps, the third year it leaps. In other words, don’t expect instant jungle vibes. It takes time for perennials and landscaping to settle in and really flourish. Be patient—your garden’s best days are ahead!
How to garden for beginners?
Start small and keep it simple. Pick a few low-maintenance plants—like pothos indoors or marigolds outdoors—and focus on learning what they need. Use good soil, give them the right amount of light and water, and don’t stress about perfection. Gardening is all about learning as you grow—literally.
Looking for the perfect gift for Mother’s Day? Explore our guide to the best gardening gifts that will delight any green-thumbed mom. From practical garden tools to beautiful plants, find the ideal present to celebrate her love of gardening.
Mother’s Day is just around the corner, and what better way to show appreciation for the special women in our lives than with gifts that nurture their love for gardening?
These unique garden gifts for mom are sure to make her Mother’s Day extra special while nurturing her love for gardening and connecting her with nature.
Whether your mom is a seasoned gardener or just starting out, we’ve curated a list of thoughtful and practical gardening gifts that are sure to bring a smile to her face.
From practical gifts like tools to beautiful plants, let’s explore this selection of hand-picked gifts to make this the best Mother’s Day for the green-thumbed moms in your life.
Ideas for Mother’s Day Garden Gifts
Self-Watering Planter
A self-watering planter makes an ideal Mother’s Day gift for busy moms, offering convenience and ease of use by eliminating the need for frequent watering. It ensures consistent moisture levels for healthier plant growth, making it perfect for moms new to gardening or those with busy schedules. This thoughtful gift brings the beauty of nature into mom’s home while simplifying her gardening routine.
Handmade Gifts
Handmade gardening gifts are the perfect way to make Mother’s Day extra special by adding a personal touch to the celebration. From DIY herb garden kits to small terracotta pots for air plants, these thoughtful creations express your love and appreciation while encouraging mom’s passion for gardening. Whether it’s customized round garden stones or pressed flower artwork, each beautiful gift will be cherished as mom tends to her garden with joy, creating lasting memories of love and appreciation.
Bird Baths
Bring the beauty and serenity of nature directly to mom’s backyard with a bird bath, providing a peaceful oasis for birds to bathe and drink. Additionally, watching birds visit the bath can offer moments of relaxation and joy, making it a thoughtful and meaningful present for any nature-loving mom.
Sun Hat
Combine practicality with style, offering protection from the sun’s harmful rays while adding a fashionable accessory to mom’s wardrobe. A sun hat can be a versatile and timeless addition to mom’s summer wardrobe, ensuring she stays cool and comfortable under the sun during outdoor activities like gardening, picnics, or beach outings.
Personalized Garden Tote
A personalized garden tote is a thoughtful and practical gift for mom on Mother’s Day because it combines functionality with sentimental value. It provides a convenient way for mom to carry her gardening tools and supplies while also adding a personalized touch with her name or a special message. Every time she tends to her garden, she’ll be reminded of your thoughtfulness and appreciation for her green thumb.
Gardening Tools:
Equip mom with a high-quality gardening tool set featuring essentials like a trowel, cultivator, pruning shears, and gloves. This is the perfect gardening gift because it’s practical and essential for any gardening enthusiast. Be sure to opt for high-quality, durable tools that will withstand regular use.
Personalized Garden Flags:
Add a personalized touch to her garden with a custom garden sign featuring her mom’s name or a special message. It’s a thoughtful way to make her outdoor space feel uniquely hers.
Herb Garden Kit:
Help mom cultivate her own culinary herbs with a ready-to-grow herb garden kit. Compact and easy to maintain, it’s perfect for adding fresh flavors to her favorite dishes.
Garden Journal:
Encourage mom to document her gardening journey with a beautiful garden journal. From planning and planting to harvest and beyond, it’s a keepsake she’ll cherish for years to come.
Flowering Plants:
Brighten up mom’s garden with a selection of flowering plants like roses, hydrangeas, or peonies. Choose her favorite blooms to add color and fragrance to her outdoor oasis.
If gifting plants, make sure they are suitable for mom’s gardening zone and care requirements.
Vertical Garden Planter:
A vertical garden planter allows mom to maximize her gardening space by growing herbs, flowers, or small vegetables vertically, ideal for those with limited outdoor space.
Bee Hotel:
Help support local pollinators by gifting mom a bee hotel, providing a safe nesting habitat for solitary bees and other beneficial insects to thrive in her garden.
Garden Kneeler and Seat:
Ensure mom’s comfort while gardening with a garden kneeler and seat, designed to provide support and cushioning for her knees and back during long hours spent tending to her plants.
Seed Bomb Kit:
Encourage biodiversity in mom’s garden with a seed bomb kit, containing a variety of wildflower seeds packaged into easy-to-use seed bombs that she can scatter and watch bloom into vibrant flowers.
Herb Drying Rack:
Help mom preserve her homegrown herbs with a herb drying rack, allowing her to air dry herbs like basil, rosemary, and thyme for culinary use throughout the year.
Garden Subscription Box:
Treat mom to a garden subscription box that delivers a curated selection of seeds, plants, gardening tools, and accessories to her doorstep each month, providing her with new inspiration and surprises for her garden.
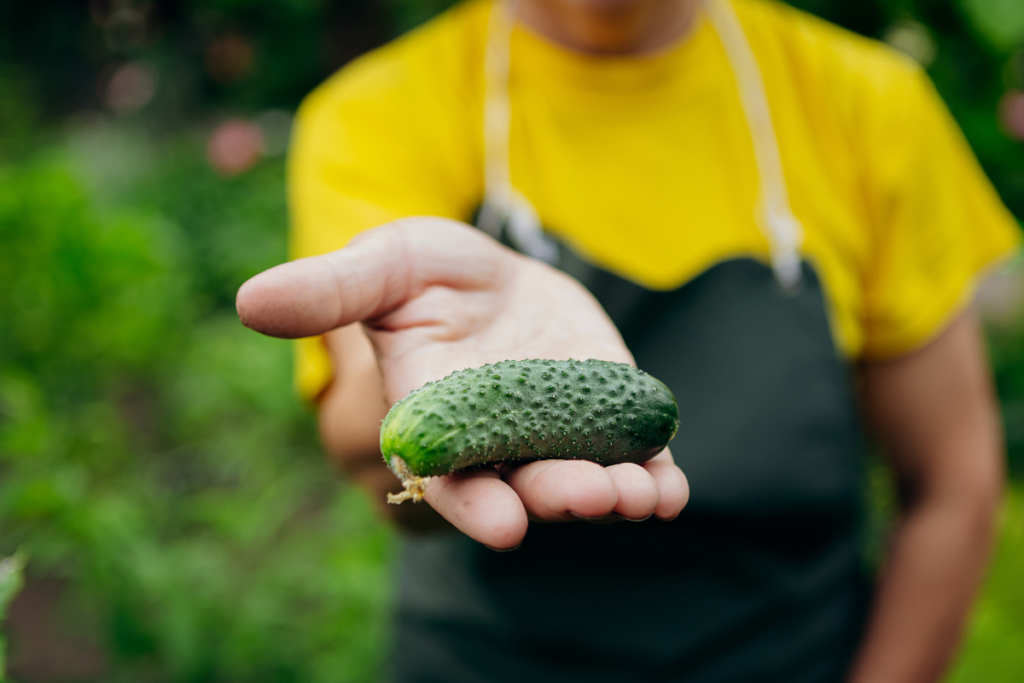
Learn how to grow your own cucumbers from seeds with our easy guide! Discover tips, FAQs, and step-by-step instructions for a successful cucumber harvest.
Growing cucumbers from seeds is a rewarding experience that allows you to enjoy fresh, homegrown cucumbers straight from your garden.
Cucumbers thrive as a warm-weather crop, flourishing in the heat of the summer months. They love basking in the sunshine and require ample warmth to grow and develop properly. With their high water content, they enjoy the summer heat, making it the perfect time to plant and cultivate these refreshing and crunchy vegetables.
Whether you’re a seasoned gardener or a beginner, our guide will walk you through the process and provide you with all the information you need to grow healthy cucumber plants.
Cucumber Season Months
Cucumber season typically spans from late spring around late May to August in many regions, with peak availability during the summer months. However, the exact timing can vary depending on the local climate zone and growing conditions.
How to Grow Cucumbers From Seeds
Start Indoors: Begin by planting cucumber seeds indoors about 3-4 weeks before the last frost date in your area. Use seed starting trays filled with seed starting mix, and plant the seeds about 1 inch deep.
Provide Adequate Light and Water: Place the seed trays in a warm, sunny location or under grow lights. Keep the soil surface consistently moist but not waterlogged, and ensure good drainage to prevent damping off.
Transplant Seedlings: Once the seedlings have developed their second set of leaves, they are ready to be transplanted outdoors. Choose a sunny location with well-drained soil, and space the young plants about 12-24 inches apart.
Support the Plants: Cucumber vines can grow long and sprawling, so it’s important to provide support for the plants. Use trellises, cages, or stakes to help support the vines and keep the cucumber fruits off the ground.
Maintain Consistent Watering: Cucumbers require regular watering to keep the soil evenly moist. Water deeply at the base of the plants, and avoid overhead watering to prevent fungal diseases.
Harvest Frequently: Harvest ripe cucumbers when they reach the desired size, typically 6-8 inches long for slicing cucumbers. Regular harvesting encourages more fruit production and prevents overripe cucumbers.
Enjoy Fresh Cucumbers: Once harvested, enjoy your homegrown cucumbers fresh in salads, sandwiches, pickles, or as a healthy snack!
How to Grow Cucumbers From Seeds in Pots
To grow cucumbers from seeds in pots, start by filling a large container with nutrient-rich potting soil. Plant cucumber seeds about 1 inch deep and 3-4 inches apart in the center of the pot. Water the soil thoroughly and place the pot in a sunny location. Keep the soil consistently moist but not waterlogged, and provide support for the cucumber vines to climb as they grow. Harvest cucumbers when they reach the desired size for optimal flavor and texture.
Tips for Growing Cucumbers
Choose cucumber varieties that are well-suited to your growing region and climate.
Consider using mulch around cucumber plants to help retain soil moisture and suppress weeds.
Monitor for pests and diseases regularly, and take appropriate measures to control them if necessary. Harvest cucumbers early in the morning when they are at their crispest and most flavorful.
How long does it take to grow cucumbers from seed?
Cucumbers typically take about 50 to 70 days to grow from seed to harvest, depending on the variety. Some varieties may mature faster or slower, so it’s essential to check the specific seed packet or plant label for the estimated days to maturity. Additionally, growing conditions such as temperature, sunlight, and soil quality can also impact the growth rate of cucumbers.
How many cucumber seeds per hole?
When planting cucumber seeds, it’s generally recommended to sow 2 to 3 seeds per hole. This allows for better germination rates, ensuring that at least one seed will successfully sprout. After the seeds have germinated and the seedlings have grown a few inches tall, you can thin them out by removing the weaker seedlings, leaving only the healthiest plant in each hole to grow to maturity.
How far apart to plant cucumber seeds?
When planting cucumber seeds directly in the garden, space the seeds about 1 inch apart in rows that are approximately 3 to 4 feet apart. This spacing allows the cucumber plants to have enough room to spread out as they grow while also maximizing the available garden space. As the seedlings develop, thin them out so that each healthy plant is about 12 to 18 inches apart within the row.
How deep to plant cucumber seeds?
Cucumber seeds should be planted about 1 inch deep in the soil. This depth allows them to have adequate contact with the soil for germination while still being shallow enough to easily emerge once they begin to sprout. After planting, gently pat down the soil to ensure good seed-to-soil contact and water thoroughly to help initiate germination.
How much water do cucumbers need?
Cucumbers typically require about 1-2 inches of water per week, either from rainfall or irrigation. However, this can vary based on factors like weather conditions and soil type. It’s essential to keep the soil consistently moist but not waterlogged to support healthy cucumber growth.
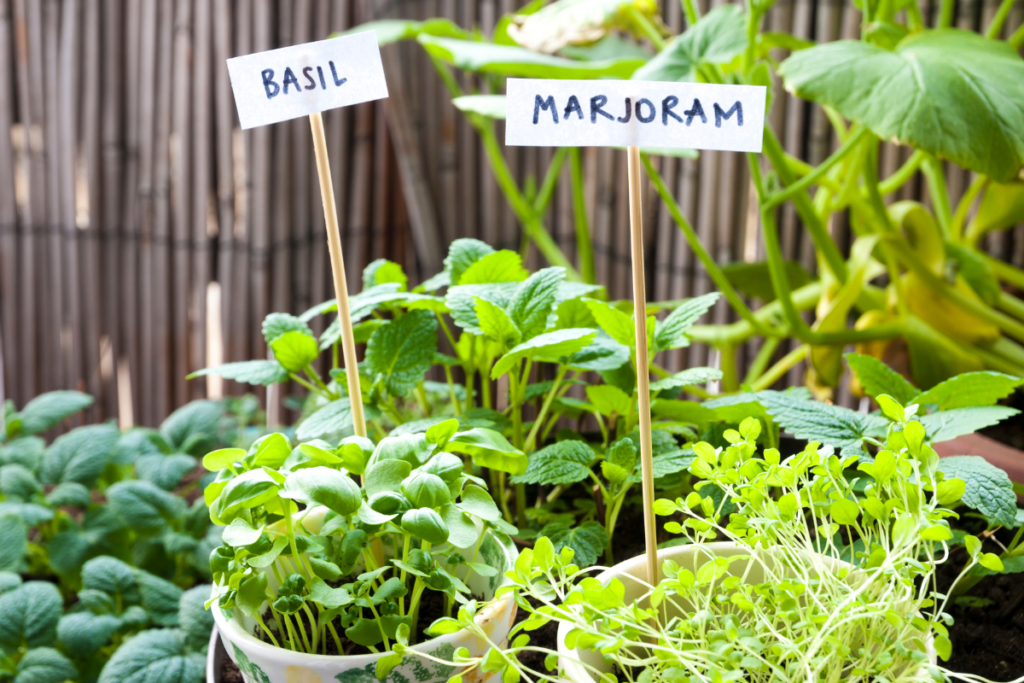
Herb gardens are like a little slice of paradise for those who love gardening and cooking. Mastering the art of a thriving herb garden can take your dishes to a whole new level, capturing the freshest flavors and scents for your culinary creations.
Planning Your Herb Garden Paradise
Before breaking ground, it’s smart to plan and visualize what you want to achieve with your fresh herbs. Consider the following steps to set a solid foundation:
Step 1: Choose the Right Spot
Herbs generally love sunlight—find a spot in your yard or on your balcony that receives at least 6 hours of sun. A sunny location will make a big difference in the health of your plants. They also like well-draining soil, so if your chosen area tends to puddle after rain, you’ll need to amend the soil with organic matter or use a raised garden bed.
Using a raised bed is a great way to control the soil quality and drainage of your herb garden. You can also choose to use a large container when planting. This is especially good when growing things like mint plants that are known for taking over a small space.
Step 2: Decide on the Herb Garden Size
Will your herb garden be a small corner or a larger section of your vegetable garden? Consider the number of herbs you want to grow and how much space each one needs. Don’t forget to plan for pathways or access to other parts of your garden.
Step 3: Group Herbs Wisely
There are several ways to group herbs. You can cluster them by their water and light requirements, or by their use—culinary, medicinal, or aromatic for example. Grouping can enhance the appearance and functionality of your garden.
Step 4: Think About Design
A well-designed herb garden is not just about function, but also form. Whether you prefer tidy rows or a more naturalistic approach, designing your garden before planting will help achieve an aesthetic balance that pleases the eye and the nose.
How to Grow Your Kitchen Herb Garden Indoors
Growing a kitchen herb garden indoors is an excellent option for those with limited outdoor space or for anyone who wants to have fresh herbs at their fingertips year-round. Here are a few essential tips to ensure your indoor herb garden thrives:
Choosing the Right Herbs
Select herbs that you love to cook with and those that can adapt well to indoor conditions. Basil, chives, mint, oregano, parsley, and thyme are all great choices for starting an indoor herb garden.
Providing Sufficient Light
Herbs need plenty of light to grow. A sunny kitchen window is ideal. South facing windows or window boxes will bring the best light for the plants. If natural light is hard to get with a limited space, consider using grow lights placed a few inches above the plants for at least 6-8 hours per day.
Proper Watering
Overwatering is a common mistake in indoor gardening. Ensure your pots have drainage holes and water your herbs when the top inch of soil feels dry. Remember, different herbs have different water needs, so research each plant’s preferences.
Fertilizing
Use a liquid fertilizer at half strength every 4-6 weeks to provide nutrients, especially if using grow lights, as plants may not get all they need from potting soil alone.
Essential Herbs for Your Garden
The list of potential herbs is vast, but certain ones consistently prove themselves for their value in the garden and in your culinary ventures. Here are some must-have herbs to consider planting:
Basil (Ocimum basilicum)
Basil is a warm-weather favorite, and it’s an essential addition for any herb garden, particularly for lovers of Italian cuisine. This herb is frost-sensitive, so wait until all danger of frost has passed before planting.
Rosemary (Rosmarinus officinalis)
This Mediterranean beauty is a hardy perennial herbs in many places. It requires well-drained soil and a sunny spot. Rosemary’s pungent flavor is a favorite for seasoning meats and vegetables.
Thyme (Thymus vulgaris)
With its delicate flowers and aromatic leaves, thyme is a hardy herb that can tolerate some neglect. It’s perfect for seasoning all sorts of dishes and is a great companion plant for many vegetables.
Parsley (Petroselinum crispum)
There are two main types of parsley—flat-leaf (Italian) and curly-leaf. Both are biennial herbs but most gardeners grow them as annual herbs. Parsley adds a fresh, clean flavor to dishes and is often used as a garnish.
Chives (Allium schoenoprasum)
These grass-like perennials are part of the onion family, and their mild onion flavor is a delightful addition to salads, omelets, and many other dishes.
Lemon Balm (Melissa officinalis)
This perennial herb has a refreshing lemony scent and can add a citrusy kick to drinks, fruit salads, and desserts. It’s also known for its calming properties and is often used in teas.
Lemon Verbena (Lippia citriodora)
Lemon verbena is a must for anyone who loves a citrus scent and flavor in their dishes. This perennial shrub thrives in sunny spots with well-drained soil. It’s perfect for adding a lemony zest to teas, desserts, and fish dishes. Although it’s less hardy than some herbs, it can be brought indoors or grown in a pot in colder climates to protect it from frost.
Sweet Marjoram (Origanum majorana)
Sweet Marjoram is a tender perennial often treated as an annual in cooler climates. It enjoys full sun and well-drained soil. The herb’s warm, sweet flavor makes it versatile in the kitchen, where it can be used in a variety of meat dishes, soups, and sauces. Its leaves are also a lovely aromatic addition to bouquets and herbal wreaths.
Using companion plants is a technique where you plant certain types of plants together to help each other grow. In the case of herbs, companion planting can deter pests and encourage beneficial insects. Even the easiest herbs will grow better when they are partnered with companion plants.
Marigolds (Tagetes)
Marigolds are often praised for their ability to deter nematodes in the soil. Planting them near your herbs can help keep your soil healthy.
Lavender (Lavandula)
Beyond being a fantastic herb on its own, lavender can repel moths, fleas, and other insects. It can be a great herb to plant near the entrance to your garden or near susceptible plants.
Sage (Salvia officinalis)
Sage is known for its strong scent and is often used to make herbal smudge sticks. This same scent can deter pests when planted near susceptible crops.
Caring for Your Herb Garden
Herbs are generally low-maintenance, but a little care will go a long way in ensuring they stay healthy and productive.
Soil
Most herbs prefer well-drained, slightly alkaline soil. If your soil is heavy or clay-like, add some organic matter to improve drainage.
Watering
Overwatering can be more detrimental to herbs than under-watering. Most herbs prefer to dry out a bit between watering, so check the soil moisture with your finger before reaching for the watering can.
Fertilizing
In most cases, a light feeding with a balanced organic fertilizer twice a season should be sufficient for your herbs. Some, like basil, are considered heavy feeders and may benefit from an additional feeding.
Pruning
Pruning your herbs serves a dual purpose—it keeps them looking tidy and can encourage bushier growth. Pinch or snip off the growing tips to encourage side shoots and a fuller, more productive plant.
Mulching
Mulching around your herb plants can help retain soil moisture and suppress weeds. Use an organic mulch like straw or bark, and be sure not to mulch too close to the plant stems.
Seasonal Maintenance
Your approach to caring for your herb garden will change with the seasons.
Spring
In early spring, as the weather warms, your herbs will begin to wake up and start growing again. This is the time to give them a light feeding and prune them back if they’ve become leggy over the winter.
Summer
Keep a close eye on your herbs in the heat of summer. Water as necessary, and consider giving them some shade if temperatures become extreme.
Fall
Fall is the time to harvest and preserve your herbs for the winter. This can be as simple as air-drying them or as involved as making herb butters or oils.
Winter
In colder climates, some herbs may die back completely in winter. This is okay—think of it as a natural rest period for the plant. In spring, they’ll come back stronger than ever.
Harvesting and Preserving Your Herbs
The best time to harvest most herbs is just before they flower. This is when their essential oils, which give them their flavor and fragrance, are most concentrated. This is great for getting the medicinal uses out of the common culinary herbs.
Air Drying
This is the simplest method of preserving herbs. Gather small bunches and tie them together, then hang them in a warm, well-ventilated place until they’re dry.
Another way to preserve the herbs is to lay them out on a clean cloth in a single layer and let them air dry.
You can also dehydrate the herbs. To do this, place them on a baking sheet and put in the oven at its lowest setting, checking frequently until they’re dry.
Once your herbs are fully dried, store them in an airtight container away from light and heat. They should last for up to a year.
Freezing
Freezing is a good way to preserve herbs that don’t dry well, like basil. Chop the herbs and place them in ice cube trays covered with water or oil. Once they’re frozen, store the cubes in a freezer bag.
Herbal Vinegar or Oils
Herb-infused vinegars and oils make great gifts or additions to your kitchen. They’re also a fun way to extend the shelf life of your herbs while adding an extra layer of flavor to your cooking.
Ways to Use Your Herbs
Now that you have a bounty of fresh, preserved herbs at your disposal, it’s time to put them to use! Here are a few ideas:
Add chopped herbs to soups, stews, and sauces for an extra burst of flavor.
Infuse oil with herbs and use as a salad dressing or for cooking.
Make herb butter by mixing chopped herbs with softened butter and refrigerating.
Use dried herbs in homemade spice blends or rubs for meats and vegetables.
Create a refreshing herbal tea by steeping fresh or dried herbs in hot water.
Add a sprinkle of chopped herbs to roasted vegetables for added flavor.
Want to savor those herb flavors all year round? Get creative with preserving methods to find your perfect match!
Common Herb Garden Problems
Every gardener encounters issues—here are some common problems you might face and how to solve them.
Pests
Herbs can be plagued by a variety of pests, from aphids to caterpillars. Depending on the pest, you may be able to handpick them off, or you may need to use an organic pesticide like neem oil or insecticidal soap.
Disease
Fungal diseases like powdery mildew can affect herbs. To help prevent disease, water at the base of the plant and avoid getting the foliage wet. Good air circulation also helps.
Nutrient Deficiencies
If your herbs’ leaves turn yellow or they seem stunted, they may not be getting the nutrients they need. A complete organic fertilizer can usually remedy this.
Final Thoughts
Growing a kitchen garden is a rewarding pursuit that connects you more closely with the earth and with your food. It’s also an excellent way to sharpen your gardening skills and become more self-sufficient. With our guide, you’re well-equipped to start your own herb garden adventure and enjoy the abundant flavors and aromas it will bring to your life. Happy gardening!
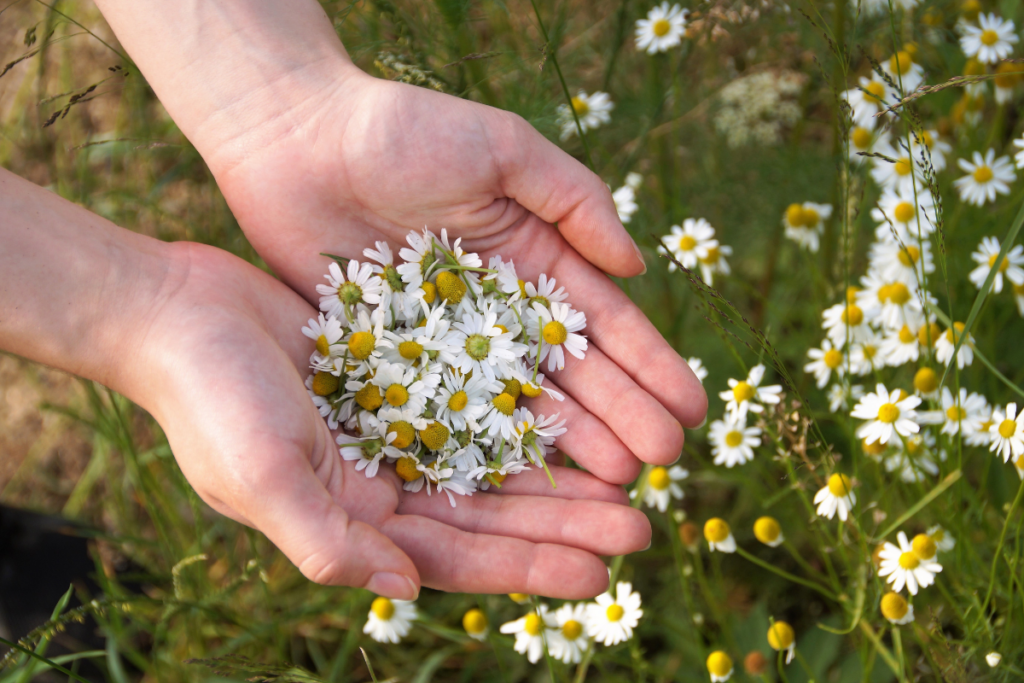
Learn how to grow chamomile with our comprehensive guide! Discover step-by-step instructions, FAQs, and expert tips to cultivate this aromatic herb in your garden.
Are you ready to add a touch of tranquility to your garden? Look no further than chamomile!
Known for its delicate flowers and soothing aroma, chamomile is a versatile herb that’s easy to grow at home. It requires minimal maintenance once established and can tolerate a range of growing conditions.
Whether you’re a seasoned gardener or a novice enthusiast, our ultimate guide will walk you through everything you need to know to cultivate this fragrant herb in your own backyard.
Chamomile is a delightful addition to herb gardens, offering not only beauty but also a range of medicinal and culinary benefits.
From herbal remedies like calming teas to soothing skincare products, chamomile has been cherished for centuries for its versatility and therapeutic properties.
How to Grow Chamomile From Seed
Planting chamomile seeds is relatively simple and can be done directly in the garden or started indoors. Here’s a step-by-step guide on how to plant chamomile seeds:
Select high-quality chamomile seeds from a reputable supplier. There are two kinds of chamomile: German chamomile seeds (Matricaria chamomilla) and Roman chamomile (Chamaemelum nobile). Decide which variety you want to grow based on your preferences and growing conditions.
Chamomile prefers well-drained soil with a slightly acidic to neutral pH. Loamy or sandy loam soil works best for this herb. Before planting, amend the soil with compost or aged manure to improve fertility and drainage.
If planting directly in the garden, sow chamomile seeds outdoors after the last expected frost date in your area. Choose a sunny location with at least 6 hours of sunlight per day. Loosen the soil to a depth of 1-2 inches and scatter the seeds over the prepared area. Lightly press the seeds into the soil and water gently.
Alternatively, you can start chamomile seeds indoors 4-6 weeks before the last frost date. Plant seeds in seed trays or pots filled with seed-starting mix. Sow seeds thinly and cover lightly with soil. Keep the soil consistently moist and place the trays in a warm, sunny location or under grow lights.
Keep the soil evenly moist but not waterlogged while seeds are germinating. Chamomile seeds typically germinate within 7-14 days. Once seedlings emerge, thin them to 6-12 inches apart to allow for proper airflow and prevent overcrowding.
If you started seeds indoors, transplant young chamomile plants into the garden after the danger of frost has passed and seedlings have developed at least two sets of true leaves. Harden off seedlings by gradually acclimating them to outdoor conditions before planting.
Water chamomile plants regularly, especially during dry spells, to keep the soil evenly moist. Apply a layer of organic mulch around plants to conserve moisture, suppress weeds, and maintain soil temperature.
How to Grow Chamomile in a Pot
Growing chamomile in a pot is a great option for those with limited space or who prefer container gardening. Here’s how to do it:
Select a pot or container that is at least 12 inches in diameter and has drainage holes at the bottom. Terra cotta or ceramic pots work well as they allow for air circulation and water drainage.
Decide whether you want to grow German chamomile (Matricaria chamomilla) or Roman chamomile (Chamaemelum nobile). Both varieties can be grown in containers, but Roman chamomile tends to be lower-growing and is often used as a ground cover.
Use a high-quality potting mix that is well-draining and has a slightly acidic to neutral pH. Avoid using garden soil, as it may become compacted in containers and hinder root growth. Fill the container with soil, leaving a few inches of space at the top for watering.
If starting from seed, sow chamomile seeds evenly across the soil surface and cover lightly with a thin layer of soil. Water gently to moisten the soil. If using transplants, gently remove the plant from its nursery container and place it in the center of the pot. Fill in any gaps with additional potting mix and water thoroughly.
Keep the soil consistently moist but not waterlogged. Water the chamomile plant whenever the top inch of soil feels dry to the touch. Avoid overwatering, as this can lead to root rot. Water at the base of the plant to prevent water from splashing onto the leaves, which can cause fungal diseases.
When to Plant Chamomile
Chamomile is typically planted in the spring after the danger of frost has passed and the soil has warmed up.
The exact timing can vary depending on your location and climate, but aim to plant chamomile seeds or seedlings with an optimal temperature that consistently reach around 50 to 75°F. In most regions, this falls between the early spring around late March and early summer.
What to Plant with Chamomile
Chamomile pairs well with a variety of companion plants in the garden.
Options include lavender, mint, borage, calendula, dill, yarrow, and thyme.
These plants not only complement chamomile aesthetically but also provide benefits such as attracting pollinators, deterring pests, improving soil health, and enhancing flavor in culinary dishes.
When selecting a companion plant, consider their growing requirements and compatibility with chamomile to create a harmonious and productive garden.
When Do You Harvest Chamomile
The white flowers of Chamomile are typically harvested when they are in full bloom, which usually occurs in the morning. This is when the flowers contain the highest concentration of essential oils, giving them their characteristic aroma and flavor.
To harvest the edible flowers, simply pinch or snip off the flower heads with scissors or your fingers, leaving a portion of the stem attached.
The best time to harvest chamomile flowers on a dry day when the dew has evaporated but before the sun becomes too hot, as this helps preserve the quality of the flowers.
Once harvested, chamomile flowers can be used fresh or dried for later use in teas, infusions, or other herbal preparations.
FAQs about How to Grow Chamomile
What type of soil does chamomile prefer?
Chamomile thrives in well-drained soil with a slightly acidic to neutral pH. Sandy loam or loamy soil is ideal for promoting healthy root growth and preventing waterlogging.
Does chamomile like sun or shade?
Chamomile generally prefers full sun, meaning it thrives when exposed to at least 6 hours of direct sunlight per day. However, in regions with hot summers, chamomile may benefit from partial shade during the hottest part of the day to prevent wilting and sunburn. Overall, providing chamomile with a sunny location ensures optimal growth, flowering, and fragrance production.
How long does chamomile take to grow?
Chamomile typically takes about 6 to 8 weeks to grow from seed to harvestable plant under optimal growing conditions. However, the exact time can vary depending on factors such as temperature, soil quality, and sunlight exposure.
German chamomile (Matricaria chamomilla) tends to grow more quickly than the Roman variety (Chamaemelum nobile), with seedlings often emerging within 7 to 14 days after planting.
Once established, chamomile plants will continue to grow and produce flowers throughout the growing season, typically from spring to fall. Regular harvesting of the flowers encourages continued blooming and ensures a fresh supply for herbal preparations.
How tall does chamomile grow?
German chamomile typically grows to a height of 12 to 24 inches, forming bushy plants with delicate foliage and daisy-like flowers. Roman chamomile, on the other hand, is a low-growing herb that reaches a height of 6 to 12 inches and spreads outward to form a dense mat of foliage, making it ideal as a ground cover. These height ranges can vary depending on growing conditions, but both varieties are relatively compact and well-suited for small gardens or containers.
Is chamomile perennial?
Yes, chamomile can be both an annual plant and a perennial, depending on the type of chamomile.
German Chamomile – This variety is typically grown as an annual. It self-seeds readily and often behaves as a short-lived perennial in milder climates. It grows as a bushy plant with delicate, fern-like foliage and produces daisy-like flowers with white petals and yellow centers.
Roman Chamomile – Roman chamomile is a perennial herb that forms a low-growing mat of foliage. It is often used as a ground cover or in pathways. Roman chamomile has small, daisy-like flowers with white petals and yellow centers and tends to be less aggressive than German chamomile.
Both varieties of chamomile prefer well-drained soil and full sun to partial shade. With proper care, Roman chamomile can return for the next growing season, while German chamomile may reseed itself and return as a perennial in favorable growing conditions.
Tips for Growing Chamomile
Start from Seed: Chamomile is best grown from seed rather than transplants. Direct sow seeds in the garden after the last frost date or start them indoors 4-6 weeks before transplanting.
Water Consistently: Keep the soil evenly moist but not waterlogged, especially during the germination period. Once established, chamomile is relatively drought-tolerant but will benefit from regular watering during dry spells.
Harvest Flowers Regularly: Harvest chamomile flowers regularly to encourage continued blooming and prevent self-seeding. Pick flowers in the morning when the oils are most concentrated for the best flavor and aroma.
Prune and Deadhead: Remove spent flowers and trim back leggy growth to promote bushier plants and prolong the blooming season.
Mulch and Fertilize: Apply a layer of organic mulch around chamomile plants to conserve moisture and suppress weeds. Avoid heavy fertilization, as chamomile prefers nutrient-poor soil.
By following these tips and guidelines, you’ll be well on your way to growing healthy and vibrant chamomile plants in your garden. Whether you’re sipping on a soothing cup of chamomile tea or adding dried flowers to your homemade skincare products, you’ll appreciate the beauty and benefits of this beloved herb. Happy gardening!
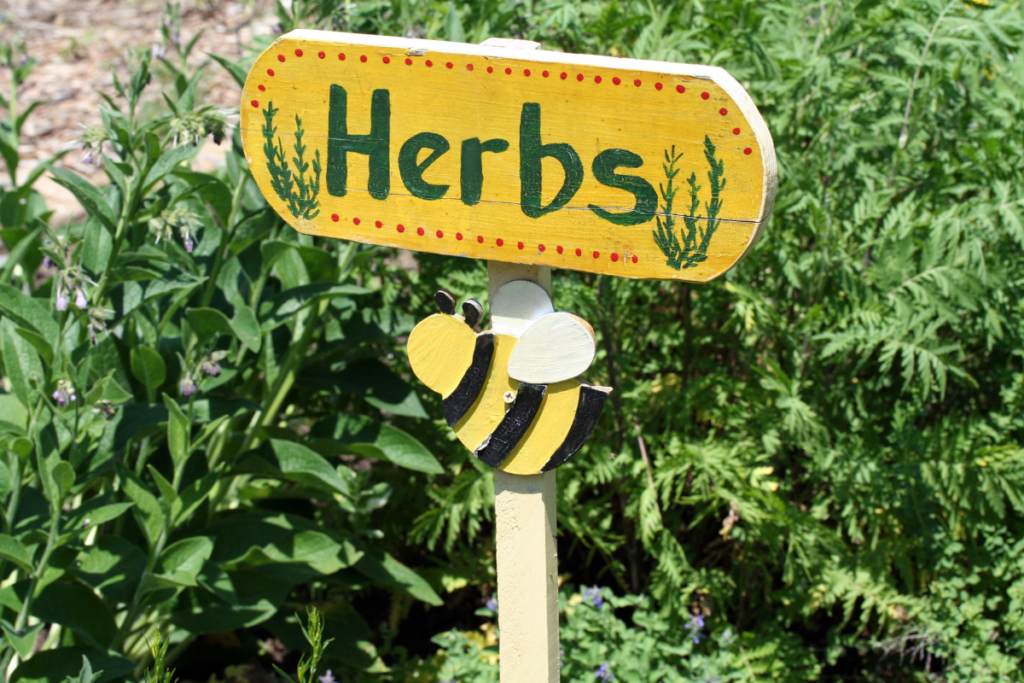
Discover expert herb gardening tips to cultivate a thriving herb garden! From choosing the right herbs to nurturing them with care, unlock the secrets to green-thumb success.
Whether you’re a seasoned gardener or a novice with a green thumb, cultivating your own herb garden is a rewarding and delightful experience.
Growing your own herbs offers a multitude of benefits, including unparalleled freshness and flavor, cost-effectiveness, and convenience.
With a personalized herb garden, you have the freedom to customize your selection of your favorite herbs to suit your culinary preferences and cooking style.
These essential herb garden tips will help you to create a thriving oasis of fresh flavors right in your backyard.
Top Tips for Successful Herb Gardening
Choose the Ideal Location
Select a sunny spot for your herb garden, as most herbs prefer full sunlight for optimal growth and flavor development. Ensure they receive at least 6-8 hours of direct sunlight per day for optimal growth and flavor development.
So, how should I arrange my herb garden?
Place your herb garden in an area that receives at least 6-8 hours of sunlight per day. Herbs generally thrive in full sunlight, so choose a spot with ample exposure.
Arrange your herb garden in a location that has easy access for watering, harvesting, and maintenance. Avoid areas that are obstructed or difficult to reach.
Group herbs with similar watering requirements together to simplify maintenance. Herbs like rosemary and lavender prefer drier soil, while basil and mint thrive in consistently moist conditions.
Arrange taller herbs like rosemary, sage, and dill towards the back of the garden or in the center of raised beds to prevent them from shading smaller herbs.
Create visual interest by mixing different colors, textures, and leaf shapes. Consider planting herbs with colorful foliage like purple basil or variegated thyme alongside traditional green varieties.
Label your fresh herbs to easily identify them, especially if you’re growing multiple varieties. Use decorative plant markers or small signs to add a personalized touch to your garden.
If space is limited, consider planting herbs in containers or vertical gardens. Use pots of varying sizes and heights to create depth and dimension, and place them in a sunny location.
Define the edges of your herb garden with decorative borders or edging materials like bricks, stones, or wood. This helps delineate the garden space and adds visual appeal.
Keep in mind the growth habits and seasonal requirements of each herb when arranging your garden. Some herbs may be annuals, biennials, or perennials, so plan accordingly for seasonal changes.
Decide Between Containers or Ground
Determine whether you want to plant your herbs in containers or directly in the ground.
So, do herbs grow better in pots or ground?
Herbs can thrive in both pots and the ground, but each option comes with its own set of considerations.
Pots:
Potted herbs allow for better control over soil quality, drainage, and sunlight exposure.
Pots offer the flexibility to move herbs indoors or to different locations based on weather conditions or space constraints.
Ideal for small spaces like balconies, patios, or windowsills where ground space may be limited.
Herbs in pots may require more frequent watering and fertilizing, and their growth may be constrained by the size of the container.
Ground:
Herbs planted in the ground can benefit from natural soil nutrients and root expansion, leading to potentially larger and more robust plants.
Ground soil tends to retain moisture better than pots, reducing the frequency of watering required.
Once established, herbs in the ground may require less maintenance compared to potted herbs.
Ground planting requires adequate garden space and may not be suitable for urban or small living environments.
Provide Good Drainage
Ensure your pots or garden beds have good drainage holes to prevent waterlogged soil, which can lead to root rot.
Prepare the Soil:
If planting in the ground, prepare the soil by removing weeds, rocks, and debris. Loosen the soil and amend it with compost or organic matter to improve drainage and fertility.
Select Your Herbs
Choose a selection of herbs based on your culinary preferences and gardening goals. Start with easy-to-grow herbs like basil, parsley, mint, and chives, which are forgiving to beginner gardeners.
Start with Healthy Plants
Opt for quality herb plants from reputable nurseries or start from seeds for a rewarding gardening experience from the beginning.
Plant Your Herbs:
If planting in containers, fill them with well-draining potting soil. Space out your herbs according to their growth requirements and label them for easy identification. For ground planting, follow spacing guidelines provided on seed packets or plant labels.
Air Circulation:
Good air circulation is essential for preventing fungal diseases and promoting healthy growth. Space out your herbs to allow air to circulate freely around them, especially in humid climates.
Companion Planting
Consider planting herbs alongside companion plants that benefit each other by repelling pests, attracting beneficial insects, or improving soil health. Research companion planting combinations to maximize the health and productivity of your herb garden. For example, basil and tomatoes thrive when planted together, while chives can deter pests from nearby plants.
Water Regularly:
Keep the soil evenly moist but not waterlogged, especially during the initial establishment period. Water your herbs early in the morning or late in the evening to minimize evaporation.
Mulch and Fertilize:
Apply a layer of organic mulch around your herbs to conserve moisture, suppress weeds, and regulate soil temperature. Herbs are relatively low-maintenance and generally don’t require heavy fertilization. Apply a balanced organic fertilizer sparingly during the growing season to provide essential nutrients without overfeeding.
Prune and Harvest
Regularly prune your herbs to encourage bushy growth and prevent them from becoming leggy. Harvest herbs frequently to encourage new growth and enjoy fresh flavors in your culinary creations. Cut just above a set of leaves to promote new growth and encourage continuous production.
Monitor for Pests and Diseases:
Keep an eye out for common pests like aphids, spider mites, and caterpillars, as well as diseases like powdery mildew and root rot. Treat any issues promptly using organic methods or pesticides if necessary.
What are the best herbs to grow in a small garden?
In a small garden, consider compact herbs like basil, parsley, chives, and thyme. These herbs thrive in containers or small spaces and provide a bountiful harvest for your culinary adventures.
How often should I water my herb garden?
A: Herbs prefer well-drained soil, so water them when the top inch of soil feels dry to the touch. Be mindful not to overwater, as this can lead to root rot and other issues.
Can I grow herbs indoors?
Absolutely! Many herbs, including basil, rosemary and mint plants, thrive indoors with proper light and care. Place your indoor herb garden on a sunny windowsill or under grow lights, and ensure they have good air circulation.
Can I grow herbs from seeds or should I buy plants?
Both options are viable for starting an herb garden. Growing herbs from seeds allows you to choose from a wider variety of cultivars and can be more cost-effective. However, starting with established plants can save time and provide a quicker harvest, especially for beginner gardeners.
What is the difference between perennial and annual herbs?
Perennial and annual herbs differ primarily in their lifespan and growth habits:
Perennial Herbs:
Perennial herbs are plants that live for more than two years.
Once established, perennial herbs can persist in the garden for multiple growing seasons, often returning year after year.
Perennial herbs usually go dormant during the winter months and regrow in the spring from their root systems.
Examples of perennial herbs include rosemary, thyme, sage, oregano, mint, and lavender.
Annual Herbs:
Annual herbs are plants that complete their life cycle within one growing season, typically one year.
Annual herbs germinate from seeds, grow, flower, set seed, and die all within a single growing season.
Unlike perennials, annual herbs do not overwinter, so they need to be replanted each year.
Examples of annual herbs include basil, cilantro (coriander), dill, and parsley.
When planning an herb garden, consider the lifespan of different herbs and whether you prefer the convenience of perennial herbs or the variety of annual herbs that can be grown.
How do I preserve herbs for later use?
Herbs can be preserved by drying, freezing, or storing them in oil or vinegar. To dry herbs, tie them in small bundles and hang them upside down in a dry, well-ventilated area. Once dry, store the herbs in airtight containers away from light and moisture. Alternatively, freeze herbs in ice cube trays with water or oil for convenient use in cooking.