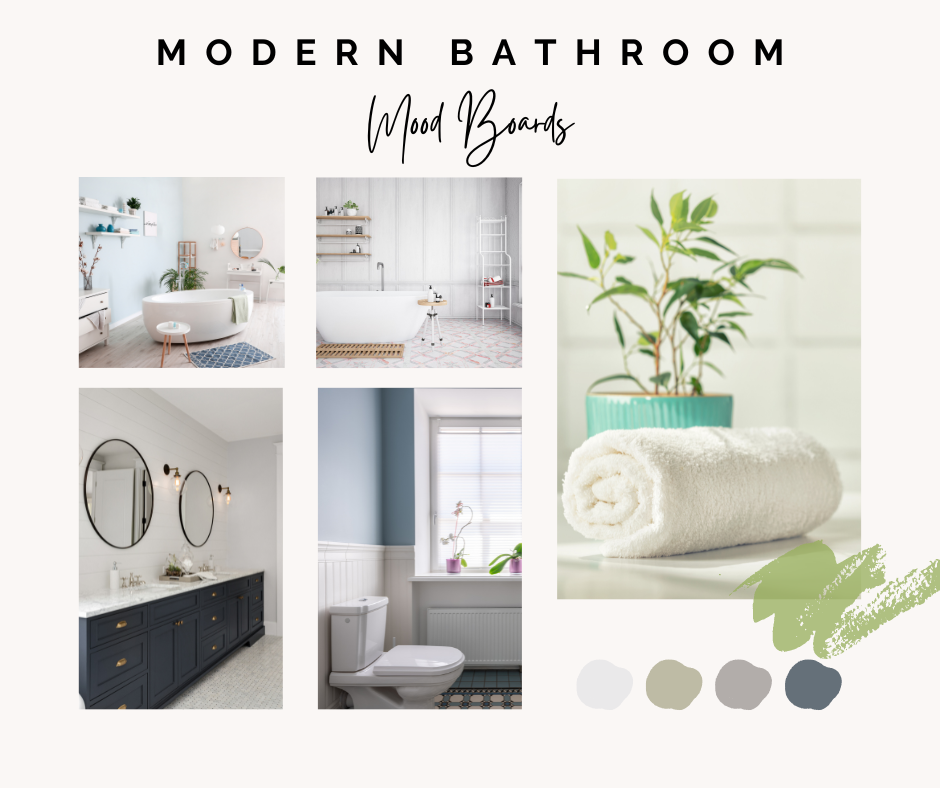
Modern Bathroom Mood Boards to Inspire Your Next Remodel
Discover how to design your dream modern bathroom with our step-by-step guide to creating a stylish mood board. Get inspired...
Discover how to design your dream modern bathroom with our step-by-step guide to creating a stylish mood board. Get inspired...

A DIY guide on how to make homemade Lavender Epsom Salt Bath Gems. Learn all about the benefits using these...
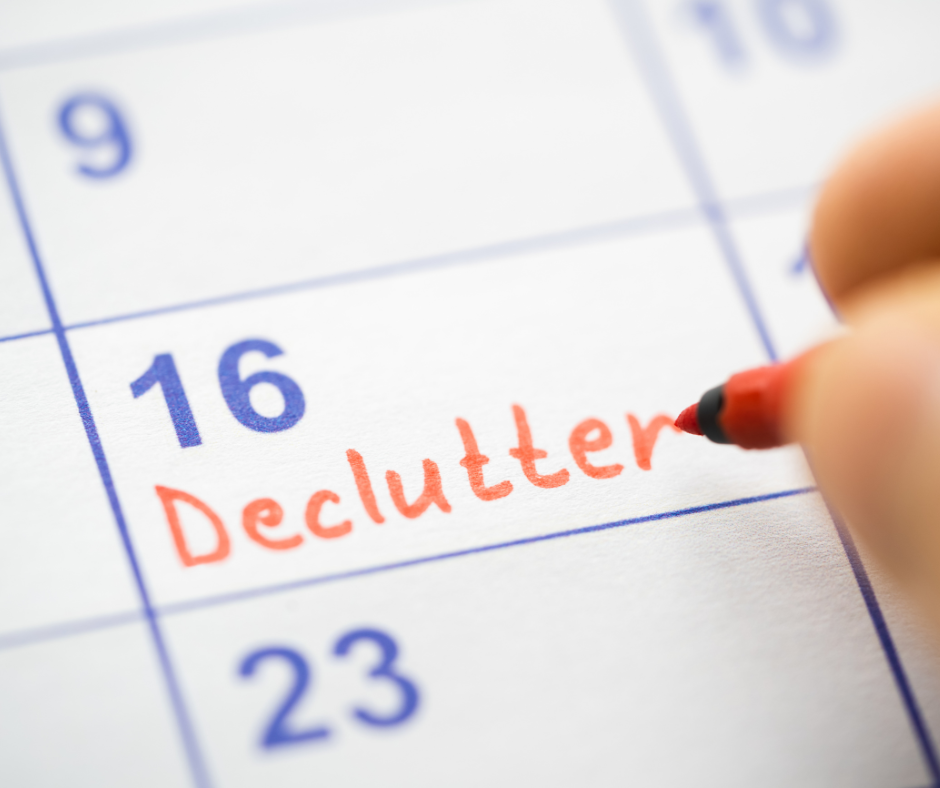
Learn effective strategies and practical tips on how to declutter a room efficiently. Discover simple steps to create a clutter-free...
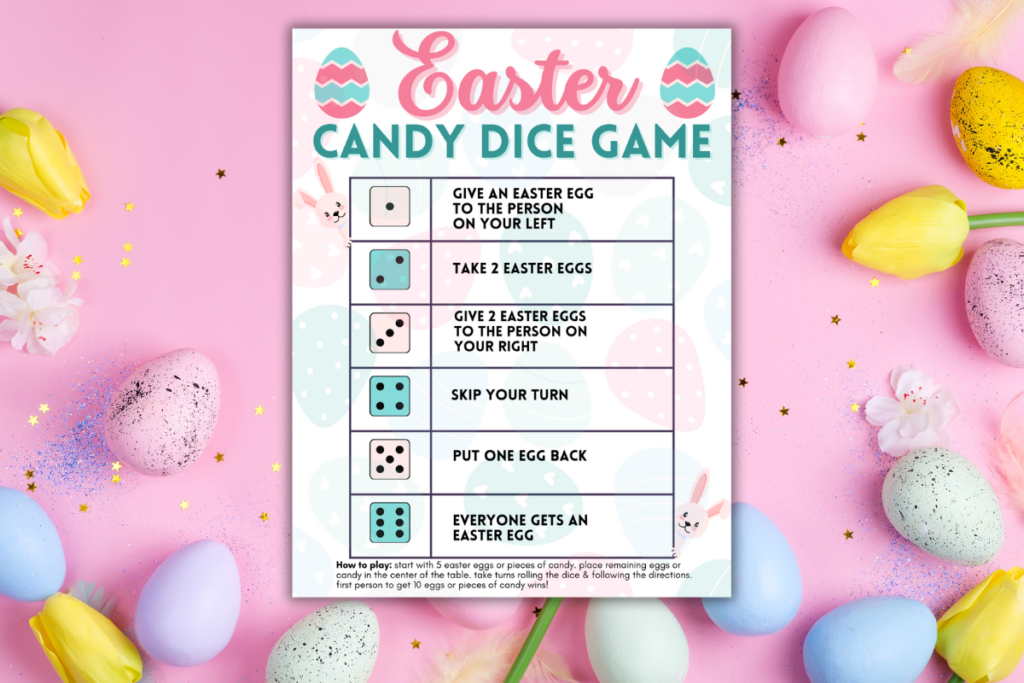
Looking for a fun Easter game? Dive into our Easter dice game printable! Roll the dice and indulge in candy-filled...
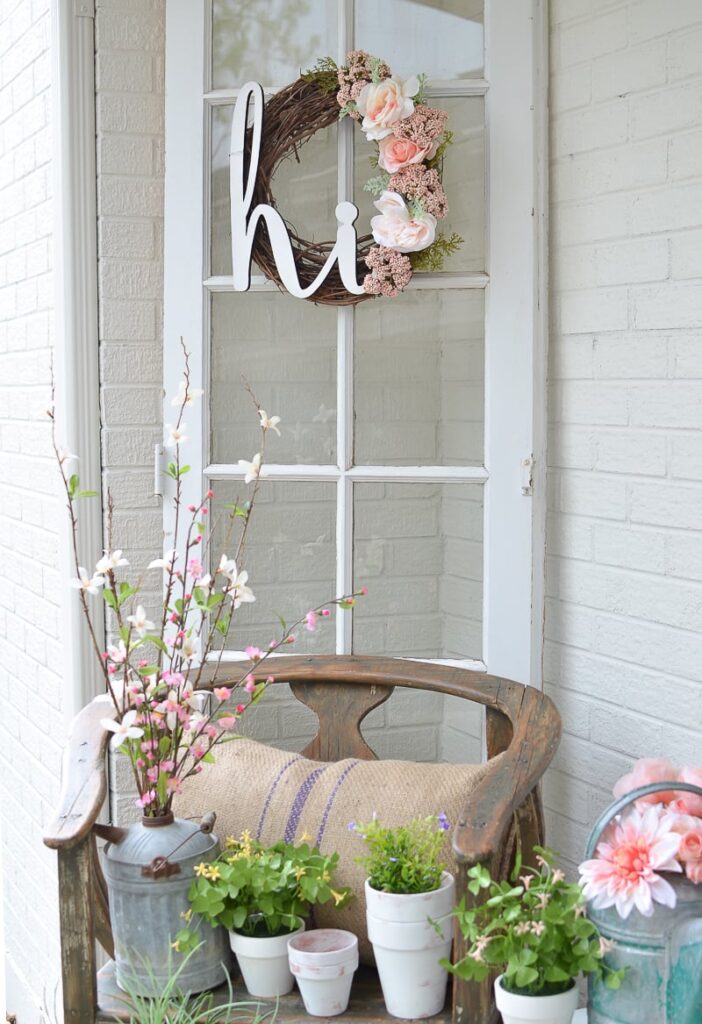
Discover delightful DIY spring wreath ideas to brighten up your home decor! Get inspired with easy-to-follow tutorials to make your...

Discover how to make a simple DIY bar cart to elevate your home entertaining! Learn how to style your own...
